Seed Saving for Beginners: 5 Easy Crops to Start With
Every packet of seeds you buy started in somebody’s garden. Saving your own is one of the oldest gardening skills there is, and it is much easier than most people think. You save money. Over the years your plants get used to your soil and climate. And you end up with something worth sharing.
The trick is to start with the right plants. Some crops give you good seed almost by themselves. Others need hand pollination, isolation distances or two growing seasons. This guide covers the easy ones, plus the few rules that matter.
Rule 1: Start with open-pollinated varieties
Before you save a single seed, check what you are growing.
- Open-pollinated and heirloom varieties come “true to type”. Seeds from a ‘Brandywine’ tomato will grow more ‘Brandywine’ tomatoes.
- F1 hybrids are a cross between two different parent lines. Their seeds will grow, but the plants can look and taste quite different from the parent. Sometimes that is a nice surprise, but usually it is not.
If the seed packet or catalogue says “F1” or “hybrid”, grow it for food and buy new seed next year. If it says “heirloom”, “open-pollinated” or “OP”, you can save it.
Rule 2: Know how your plant is pollinated
This is the part that worries beginners, but the idea is simple.
- Self-pollinating plants (tomatoes, beans, peas, lettuce) pollinate themselves, usually before the flower even opens. Different varieties growing side by side rarely mix.
- Insect-pollinated plants (squash, cucumbers, melons, most brassicas) get pollen carried between plants by bees. Two varieties of the same species grown near each other will cross. Your zucchini and your pumpkin can produce some very strange fruit next year.
- Wind-pollinated plants (corn, spinach, beets) can cross over long distances and need large numbers of plants to stay healthy.
Self-pollinators are where you start.
The 5 easiest crops for saving seed
1. Tomatoes
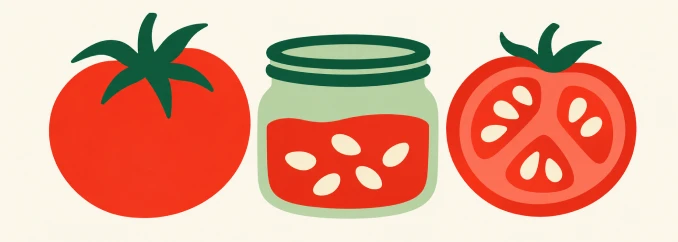
Tomatoes are the classic first crop. Most varieties self-pollinate, so you can grow several kinds side by side and still get true seed. Pick a fully ripe, slightly overripe fruit from a healthy plant, and scoop out the seeds with their jelly.
Tomato seeds sit in a gel that keeps them from sprouting, so they are best cleaned by fermentation. It takes a few days and is a fun kitchen project. We cover it step by step in How to Save Tomato Seeds.
2. Beans
Beans might be the easiest seed of all. Leave a few pods on the plant until they turn yellow and papery and the beans rattle inside. Pick them, shell them, and let the beans dry indoors for another week or two.
Tip: once the beans are fully dry, put them in the freezer for 48 hours. This kills any bean weevil eggs hiding inside, which could otherwise hatch and eat your seed in storage.
3. Peas
Peas work the same way as beans. Choose a few of your best plants and stop picking from them. Let the pods dry and turn brown on the vine, then shell and dry the peas. A finished pea seed is hard and wrinkled or smooth depending on the type, and should not dent when you press it with a fingernail.
4. Lettuce
Lettuce does something most gardeners try to avoid: it bolts. Let one or two plants go. They will grow tall, flower with small yellow blooms, and then make fluffy white seed heads that look a bit like small dandelions.
When most of the heads are fluffy, bend the stalk into a paper bag and shake. The seeds will fall in. Lettuce crosses very rarely, so you can save several varieties at once.
5. Peppers
Peppers are mostly self-pollinating, but bees do visit them, so different varieties can cross now and then. If you want to be safe, grow only one variety for seed, or keep varieties several metres apart.
Leave the pepper on the plant until it is fully ripe, usually red, orange or yellow and slightly soft. Cut it open, rub the seeds off the core onto a plate, and let them dry. No fermentation needed.
Careful with hot peppers: wear gloves. The oil stays on your hands for hours.
Which crops to leave for later
These crops are perfectly possible to save, but they are better for your second or third year:
- Squash, pumpkins and cucumbers cross easily through insects. You’ll need to hand-pollinate and tape flowers shut, or grow only one variety of each species.
- Corn is wind-pollinated and needs dozens of plants to avoid weak seed.
- Carrots, beets, cabbage and onions are biennials. They only flower in their second year, so you have to keep the plants alive over winter.
Choose your best plants, not your last ones
A common beginner mistake is saving seed from whatever is left at the end of the season. Instead, mark your best plants early with a ribbon or stake. Choose the ones that were healthiest, tasted best, cropped earliest or handled your weather best. Over the years, this simple habit adapts a variety to your garden.
If you can, save seed from several plants rather than just one. It keeps the variety genetically healthy.
Dry it, label it, store it
Whatever you save, the last steps are the same:
- Dry the seeds well. Spread them on a plate or a coffee filter somewhere airy and out of direct sun for one to two weeks. Big seeds like beans are dry when they break instead of bending.
- Label everything right away. Write the variety, the date and anything you want to remember (“best plant by the fence”, “very sweet”). You will not remember next spring which bowl was which.
- Store them cool, dry and dark. Read How to Store Seeds So They Last for Years for the details.
A paper seed packet is ideal: it breathes, it’s easy to label, and it looks lovely in a seed box. You can design and print your own for free with the Seed & Share packet maker.
Share what you save
One tomato can give you a hundred seeds or more, far more than you will ever plant. That’s the best part of seed saving. Give a few packets to neighbours, bring them to a local seed swap, or tuck them into a birthday card. Seeds were always meant to be passed on.